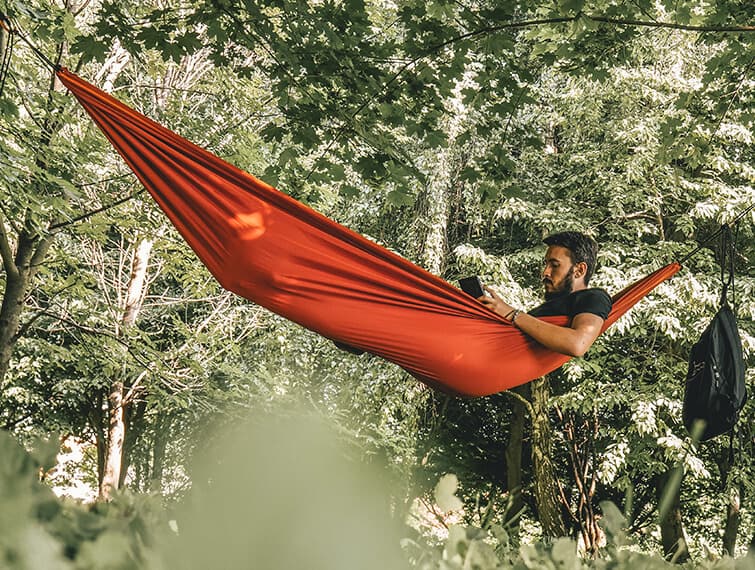
If you are headed out for an outdoor adventure, level up your experience by bringing a hammock. There are some sweeter moments in life compared to lying in hammocks, watching sunset as you sway in gentle breeze, which is a great moment made nicer once you have somebody to share the experience.

Hammocks are good for solitary reading, snuggling with friends under the stars, afternoon napping, and several gear manufacturers have designed camping hammocks made from the tent materials for total airborne experience.
Regardless of what its purpose, it is essential to ensure that the best knots used for tying the hammock between 2 trees may withstand the weight.
The knots you have chosen for stringing up your hammock must be durable and have an ability to hold the weight of 2 people.
Below are best knots to tie up a hammock:
Bowline Knot
Sometimes described as the “king of knots”, the bowline knot isn’t just one of the oldest knots in human history but it’s also one of the strongest and most versatile as well.
Frequently used in the maritime world (which is how it got its modern name), this knot does particularly well when “under load”. It cinches tight, is easy to tie, and is easy enough to untie without compromising the security of the knot itself.
To get started with a bowline knot, first make a loop near the end of the rope, passing a section of the rope through that loop before circling around the other end, passing back through the loop, and then tightening to cinch everything.
Half Hitch Knot
A very simple overhand knot, all you really have to do with the half hitch knot is bring the working end of a rope or line over the standing part of that rope and line and then tuck it underneath where these two pieces meet – cinching things simply (though not particularly securely).
To make the most of half hitch knots you’re going to want to combine them with other overhand style knots – implementing hitches, bands, and other twists to really lock it into place. Two individual half hitches can be combined together to create a clove hitch, for example.
Figure 8
This type of knot is strong enough for all rock climbers. This climbing knots often used for securing harnesses. The knot’s most crucial aspect is that this can hold a particular amount of weight. It may be untied easily after holding that weight. This kind of factor makes it good for hammocks that should be taken down for bad weather or cleaning. Also referred to as Flemish knot, the figure 8 is actually the first knot that every climber learns.
Clove Hitch
For those who want quick tie, clove hitch is the best knot you should consider. It may be used on hammocks, yet only if hammocks are not a permanent fixture. Commonly, this is used for securing rope to the posts, poles or trees. Clove hitch is also common in sailing. When compared to other knots for tying hammocks, clove hitch is very easy to learn. The rope’s loose end is brought around the trees.
Fun Outdoor Quiz
Then, the end is crossed over in X-shape. The simple loop is not the knot’s end. The rope’s end is wrapped around a tree again and should be slipped underneath x shape. Basically, this is 2 of the same shape. For underhand and overhand, the rope should be an X shape. Once the shapes are made, knots are pulled tight.
Falconers Knot
Predominantly used in the falconry world to tether birds of prey to their perch, the history of this knot tying stretches back thousands of years but still remains very relevant today.
Almost always tied with a single hand (so that the individual had a secondhand free to work with the bird they were securing), you’ll want to pass the working end of the rope around a perch or post you are securing something to with the standing part of the rope extending out to the left.
Place your hand palm up underneath both sides of the rope, searching for a middle point, and then grip the rope with two fingers as though you were going to cut them with fake scissors. Reach up to the main part of the rope, turn your hand down, and rotate slightly so that the middle section of the rope comes into the knot (looking like a pretzel) and then pull things tightly towards the post you are securing.
Shoelace Knot
A shoelace knot is so simple and straightforward that it’s taught to children to tie their shoes when they are very young, and for a lot of people it’s the first knot they ever learn to tie – and for some it ends up being the only knot they learn to tie!
The basic premise is pretty simple and straightforward. What you want to do is start with two different pieces or ends of a rope, loop them together (so that they cross in the middle) passing one underneath the other. Cinch things tightly, create “bunny years” with the individual pieces of rope and then knot these together and you have the shoelace knot combination.
The whole process can be broken down to “loop, swoop, and pull”. If you’re having trouble, just ask a second or third grader for little bit of help!
Other Knots to Use to Hang Hammock
Hammock hangers basically use many types of knots. All of these are easy to learn and are common to all campers. Apart from this, they’re all simple to untie once you are done using a hammock:
Modified Bowline
Tying bowlines around a tree provides you a fixed, dependable end that will hold a huge amount of weight. If you’re not using tree straps, modify the standard bowline through wrapping it a few times around tree trunk before tying it off. For tying a bowline, take the rope’s end in your right hand as well as the running line on your left. Form an overhand loop. Pass its end in your right hand through a loop. Encircle tree two to three times and pass the end down through an original loop.
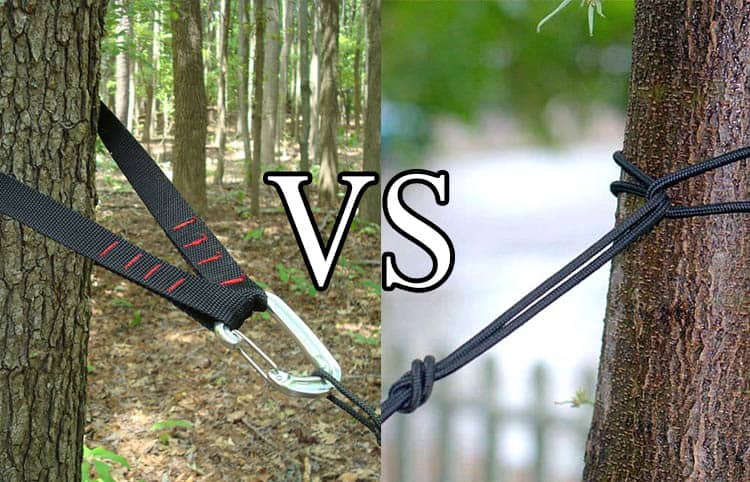
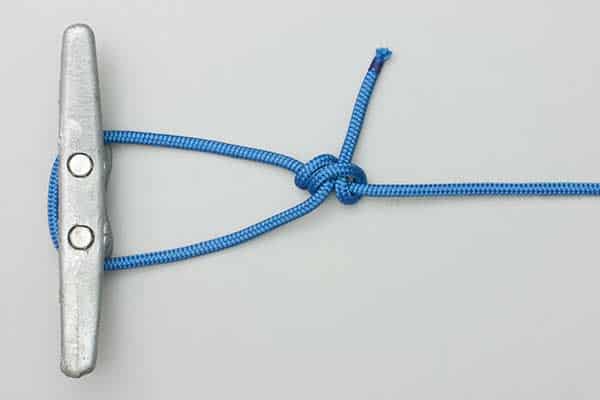
Becket Hitch
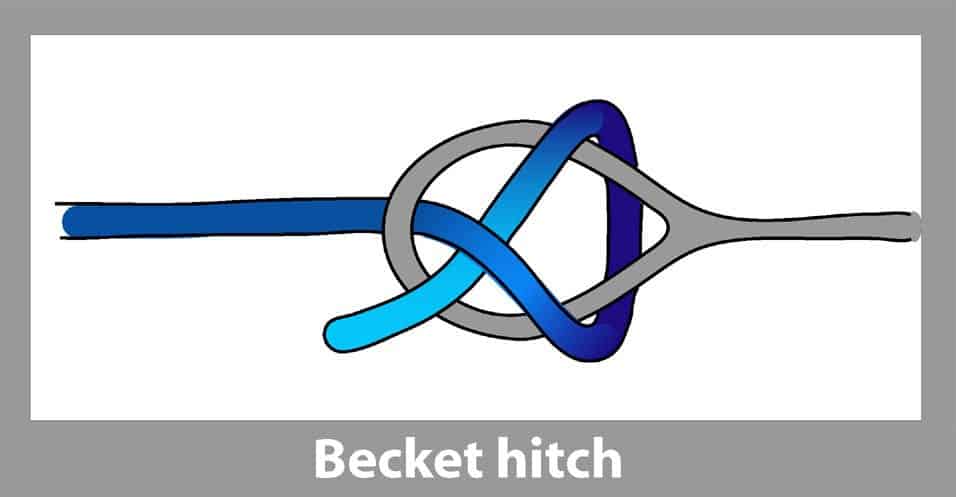
It does a great job of tightening and attaching your hammock to trees. Commonly, it’s used for this purpose, which is frequently called hammock knot. You don’t need extensive knowledge about knots to make this. It’s good for beginners and it is very effective. Typically, you will use Becket hitch to connect 2 ropes together. You may use hammock rope or webbing to make this knot more effective.
You should also be careful about this type of rope as this could damage the tree once your hammock is hung in the park or garden. To counter such effects, use webbing straps that will help you protect the trees from friction and scratches.


Backpacker Hitch
This is a perfect replacement for bowline on fixed end. This type of knot develops more friction yet the knot is not strong. It’s a great choice for smooth barked trees and hard posts.
Water Knot
It is another good knot to hold hammocks in place. This method hangs your hammock with slings, which are wrapped around your chosen tree twice and add the water knot. It is easy to do in comparison to some hammock knots. It also secures hammocks in place.
Two-Half Pitch
It is good to hold hammocks firmly to anchor points. This type of hammock knot is used for securing clothesline or hanging the hammocks to poles or trees.
Taut Line Hitch
Since you already have a fixed end, you’ll require a knot that may be adjusted for taking up slack. This kind of hammock knot is ideal for this purpose. This also makes a good tent stake knot and there are times that this is called in that term. To do this knot, you have to loop the rope a few times around the tree. Take its end and wrap it 3 times around the line, which went around the tree originally.
To lock knots, make the last loop around the one line yet under some loops and pass its end through the new loop, which will create an overhand knot. Then, the next thing you should do is to pull it tightly. It must be noted that taut line hitch is perfect for light line and would be undependable under the heavy loads. If you’re planning to put stress on hammocks, it’s best for tying a bowline at every end, working knots through taking up slack.
Hitches Knots
Our (literally) dozens and dozens of different hitch style knots that can be used in a variety of different situations. They range from pretty simple and straightforward options like the anchor bend or a bail sling hitch to the more complex adjustable grip hitch and Blake’s hitch option.
The bottom line is that these knots are always used to attach or secure a specific object with a lot of strength and a lot of security. A bump on hitch, for example, is created by moving the working end around an object, securing it with a clove hitch, and then passing that through a standing part of the rope to lock it down.
Wrapped Knot
Used pretty widely in the world of macramé, this knot can be created by taking the strand that you are building the knot with, laying it over the strands that you are tying together in a V shape, and then moving the working and around the strands you are collecting so that you “trap” the V itself.
Continue wrapping (at least five times) and then pass the working end of the strand back through the V while cinching everything together and you’ll have a very clean, very secure, and very tight wrapped knot.
Overhand Knot
Overhand knots (sometimes just called “knots” or “half knots”) are maybe the most fundamental of all the knots ever created and certainly one that is very simple to learn.
The building block that dozens of other knots are built on top of, this knot has been described as a “stopper knot” – working to provide a lot of strength, a lot of security, and immobility when the knot is designed to be permanent.
All you have to do here is simply move the working end around the standing part like a pretzel and then cinch it all together. From here you can modify or adjust the knot in a bunch of different ways depending on the specific application.
Sheet Bend
Sheet Bend knots (sometimes called back it bends, weavers knots, and weavers hitches) are primarily used for joining different ropes or lines together – especially when they aren’t necessarily the same size, same diameter, or have the same kind of rigidity.
Similar to a bowline knot in that it is rock solid and secure while under load but tends to come apart when it isn’t “working”, this is one of the simplest and easiest knots to tie.
Start off by creating a basic half hitch with the larger rope that you are working with, creating a bight. Pass the smaller rope through the bight and then up and behind the tail. Finish everything off by talking the smaller rope under itself to tighten and secure the knot and you are good to go.
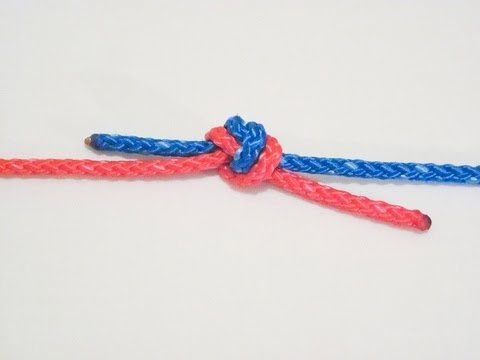
Fisherman Knot
The fisherman knot has a lot of symmetry to it, basically combining two different overhand knots with one another with the standing part adjoining the two.
This is fantastic for those that are tying two different lines together (like fisherman have to when they are switching bait and tackle) while providing a lot of holding strength compared to other knots.
All you have to do is tie a single overhand knot, leaving plenty of standing rope available to tie a second one right after. Since them both together and you are off to the races.
Square or Reef Knot
Another of the oldest knots in human history, the reef knot (or square knot) has been used for centuries as a binding knot – particularly in the maritime world. Sometimes called the Hercules knot, it’s easy to remember how to tie this particular choice by remembering “right over left, left over right, makes a knot both tidy and tight”.
You’re basically creating to individual overhand knots that square off with one another, creating a grid pattern that locks things up securely. Two consecutive over hands work together to make this knot possible.
Significance of Hammock Knots
All hikers, whether professional or new, know how significant knots are when setting up tents and hammocks aren’t different from tents with that regard. It is a fact that hammock camping is much simpler compared to camping with tents. Yet, if you’re in a situation where you haven’t tied the hammock properly and swinging from a height, you might end up getting some injuries. This might be serious once you fell on your head or some damage prone parts of your body. For you to learn how to tie a hammock and find safe locations to set it up, you have to do your homework as it is very important.